
Designing a room can be a challenge at times. There are so many different styles and layouts to choose from, which can make it overwhelming! Not to mention product sourcing… that alone is quite the task! 🙂
I recently styled my sister and brother-in-laws living room so I thought I would share the design board here as well as a few tips for designing your own space! This is the process I use each time and it really helps me keep things organized and produce a well designed space when it’s all said and done.
My Sister’s Living Room Design
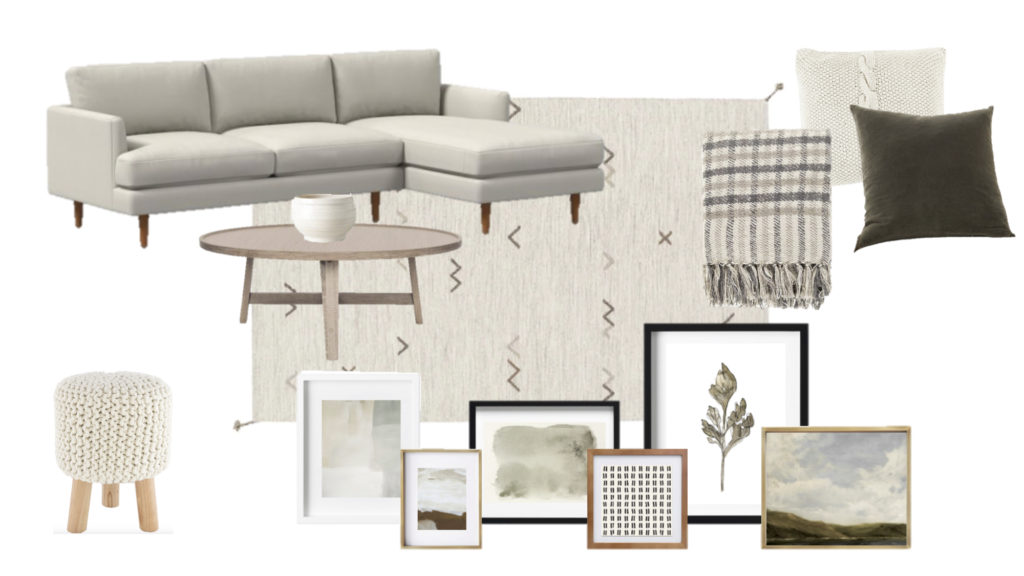
Product Links: sofa / area rug / coffee table / pot / knit pillow / olive green pillow / stool / throw blanket / curtains / floor lamp
Art from left to right: 16×20 white frame + Patchwork / 8×10 gold frame + Clay / 16×20 black frame + Textured Watercolor / 11×11 wood frame + Painted Pattern / 20×30 black frame + Dried Floral / 16×20 gold frame + October Sky
How to Plan Your Space:
1. Select Inspiration Images
Source 1-3 images that will serve as your inspiration for the space. Narrow down the style to something that really feels like YOU! There are a lot of styled I admire, but I try to stay focused on my true style when selecting these photos.
2. Source Furniture
Find pieces that fit your style, space, and budget and start saving them!
3. Create a Design Board
Use PowerPoint or another photo editing software system, like Photoshop, to layout the furniture and decor. This will help you to visualize the room before it’s complete to ensure everything flows together!
4. Purchase Product
Finalize product purchases and prep the space for arrival. This would be a good time to focus on clearing things out and refreshing paint if needed!
5. Finalize the Design
Place all the furniture and decor in it’s designated spot. Add any additional items that pull the space together! Remove anything that doesn’t work as you planned.
How to Make Your Own Design Board:
I use PowerPoint to create my design boards! It’s very easy to use and allows you to remove backgrounds on images so products present well on the board. All you have to do is copy the image of each product included in the design, remove the background, and arrange each item in an organized way. If you want a step-by-step tutorial you can CLICK HERE. This tutorial is for Microsoft Word, but similar steps can be applied in PowerPoint only you do not have to format each image when pasted. That’s why I would recommend using PowerPoint!
Hope that helps with planning your next design. Make sure to tag me in your design so I can see how you used this tutorial! 🙂


